How does DS-Econ work? A look at the Pipeline and Workflow behind this blog!
Today, we take a look behind the scenes! How does my writing land on the web? We take a technical perspective where I give you an overview of the coding pipeline and a more creative perspective, where I explain the “workflow” behind a DS-Econ post!
How does the pipeline of DS-Econ look like?
First, the technical stuff:
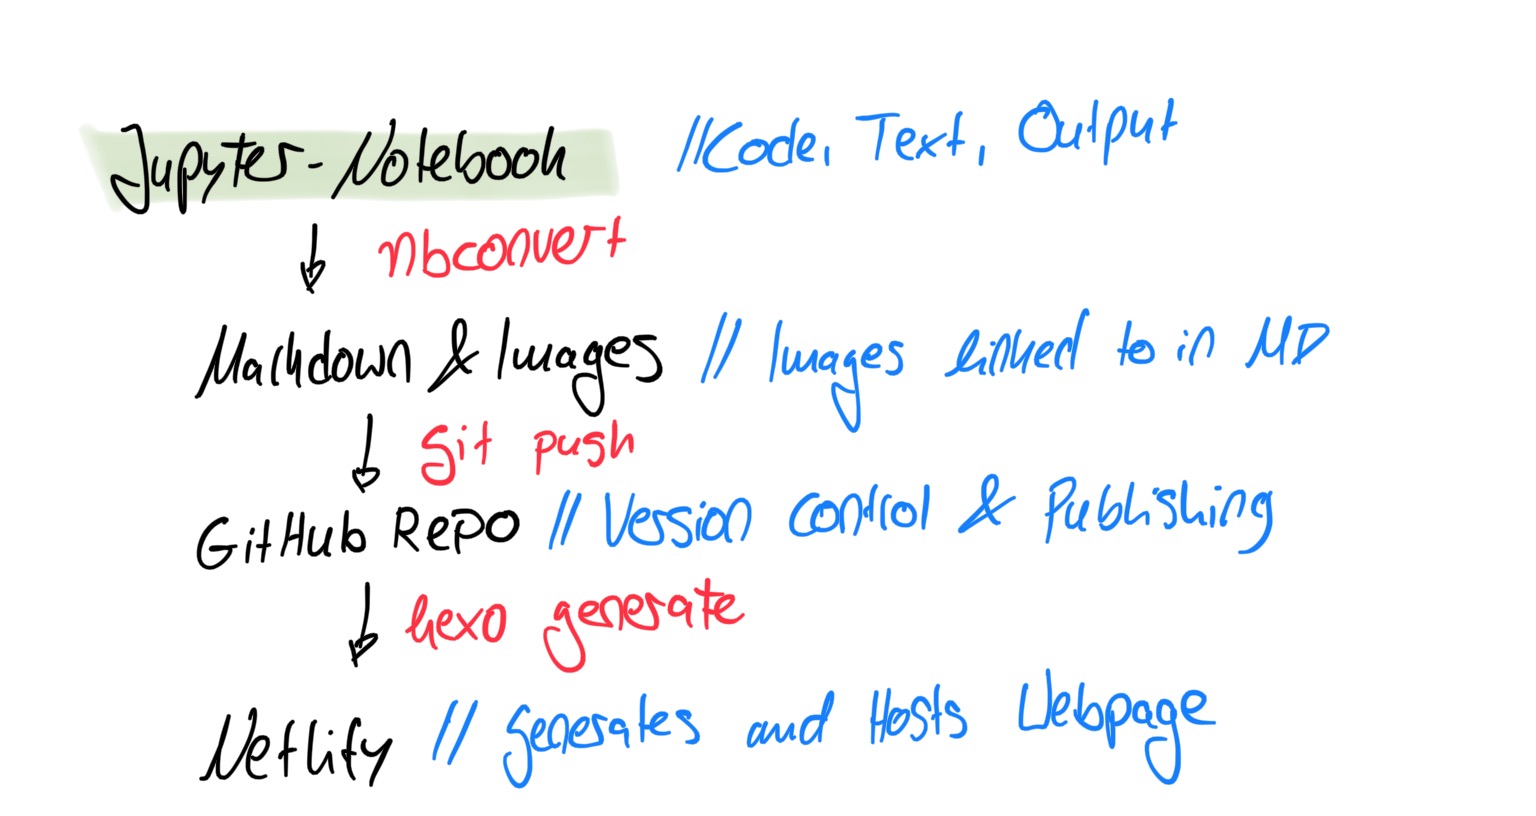
Posts are written as a jupyter-notebook and are then transformed into markdown files by nbconvert. Plots and other images in the jupyter-notebook are written to an asset folder. Paths for images from the markdown file are relative to the root-directory.
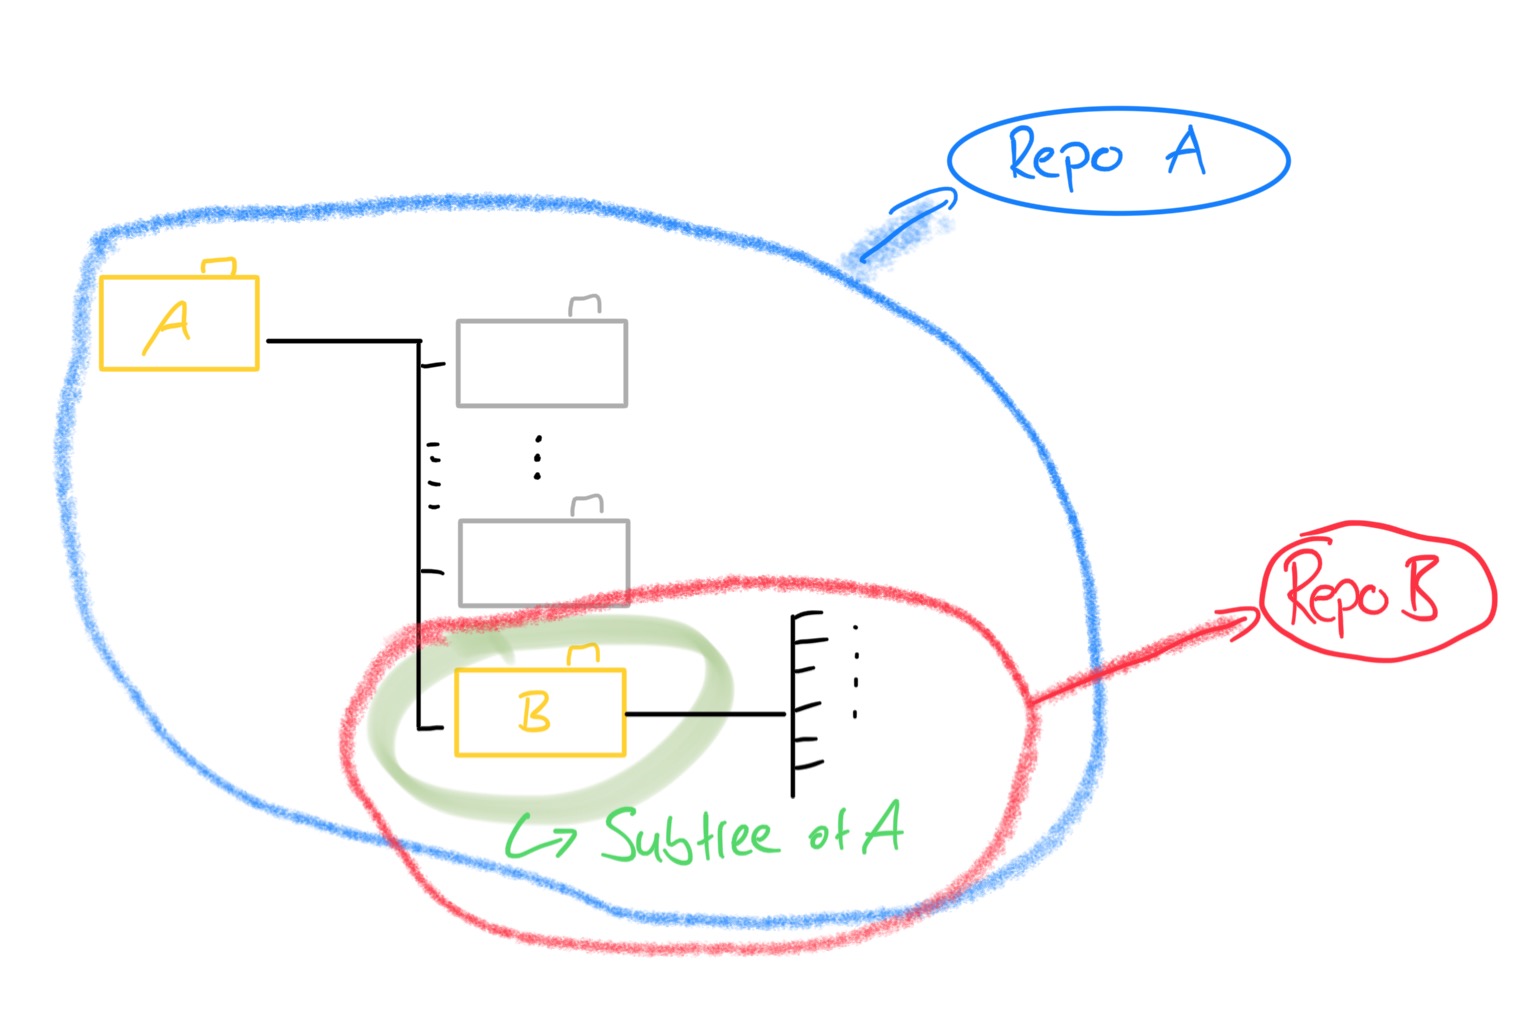
Now, the blog’s whole directory is pushed into a git-repository by git push. You can even clone this blog’s repository and use it as a starting point for your own webpage! Make sure to send me a link to your site - I’d love to see it!
After the updated repository is on Github, Netlify automatically generates the webpage with hexo and hosts it under my domain! Netlify is very lightweight and it is a great, simple hosting service. Setting up your website is very easy!
I illustrated this pipeline as a graph above!
What is the Workflow behind a DS-Econ post?
Try to come up with a workflow, that makes it fun and simple to work on your project:
To me it was important, that I can just “do my thing” in a jupyter-notebook and don’t need to worry to much about getting my writing onto the web. Hence, I tried to make my coding very reproducible and hence minimize “manual” editing required in a post.
It is not perfect yet, but so far I need to run two commands in the terminal to get my post up and running from the finished jupyter-notebook - pretty good!
Alright, but how does it work now?
Of course, the first step is to come up with an idea and do some research. However, after that I usually follow these steps:
- Write Code in
Jupyter-Notebook - Add the text around the code with
Markdowncells - “Bells and Whistles”, cell tags, links, attributions, cover and / or thumbnail
- Review and edit
- Render with
nbconvertinto markdown file - Generate locally with
hexo serverto check appearance - Jump back to step 4 if necessary
git pushto the repository- Once pushed, the repository is automatically rendered and hosted by netlify
Now the post is published! Often times, I go back to the post after a while to make some edits or update its formatting. Hence, everything is pretty malleable!
Note: By using GitHub as my “entry-point” for Netlify, I also have version control “on-the-fly”. Every post has (per construction) a git commit associated with it. Neat!
Let me know if you have ideas on how to improve the pipeline or the workflow! Like you, I am also just figuring this stuff out myself!
Photo by Glenn Carstens-Peters on UnsplashHow does DS-Econ work? A look at the Pipeline and Workflow behind this blog!